|
| |
 |
| |
MI6 looks back at the comic Shattered Helix #2 "A
Cold Day in Hell, Chapter 2" released by Dark
Horse Comics in July 1994.
| |
James Bond 007: Shattered Helix #2 "A Cold
Day In Hell, Chapter 2" Review
4th April 2005
|
The Story
"A Cold Day In Hell" picks up moments after the
end of Issue #1, with the convoy of soldiers and Bond heading
to the secret laboratory. Mr Barclay, a leading member of
Cerberus, and his entourage have arrived at the lab. They
lay in wait for Bond and company with a deadly ambush.
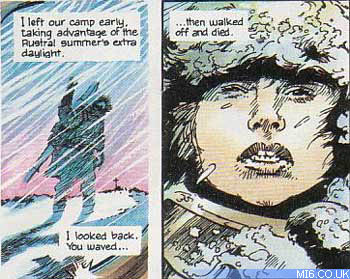
With the death of the entire accompaniment of soldiers
bar one, and a very narrow escape (which is captured in
a tour de force by "Lloyd and Jackson"), Bond,
Serena and Marine Jenkins head towards the lab, hoping to
destroy it.
Bullock manages to kill Jenkins and capture Serena, and
uses this as leverage to bring Bond out of hiding. Once
captured, Bond sees Professor Boyce carrying the deadly
DNA mutagen out of a secure vault, and a fight ensues which
results in the virus being released. Bond flees with Serena
in hand, and set off the auto destruct to the lab.
| |
Above: Cell from "Shattered Helix #2"
|
On the way out, Bond is faced by Bullock carrying the second and
final canister of the deadly DNA mutagen. With a single shot and
smart thinking, Bond kills the armour enhanced henchman. After their
escape, Miss Mountjoy continues the environmental subtext as they
witness the final destruction of the lab.
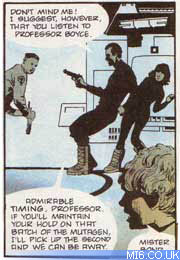
 Above: The opening panel of "Shattered
Helix #2"
Above: The opening panel of "Shattered
Helix #2" |
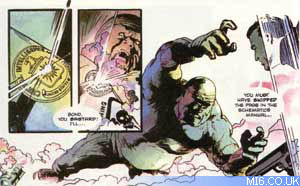
Above: Bullock makes a final attempt
to kill Bond. |
|
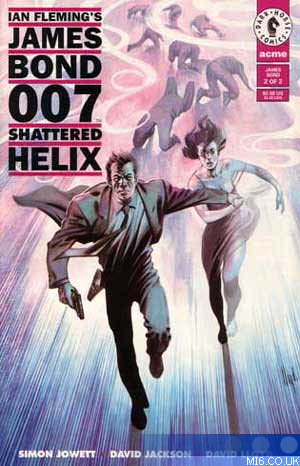
Cover Design
Bond and Miss Serena Mountjoy are seen running from the
effects of the deadly virus. The dynamic cover shows fear
in the face of Bond's companion. In the background, figures
agonize in pain as snake-like wisps of the DNA mutagen rap
around them - but fail to reach the escaping Bond and Serena.
The cover for this issue is one of the best from all the
1990's James Bond comic books.
|
| Artwork
The high standard continues in issue two, and earlier concerns
over the quality of Miss Mountjoy are put to rest with great
detail work throughout the issue. A cold, bleak look is
created giving the environment character, conveying the
cold inhospitable Antarctic and submarine like laboratory.
The ambush on the open snow is a further testament to the
use of shading and colour. Bullock's gruesome death is captured
in a single cell and gives a great sense of dread.
Dialogue
With more exposition present in part two, and more information
to get across to the reader, it has been achieved without
slowing the pace. The structure and sharp use of language
and abbreviation continue in this concluding part.
|
|
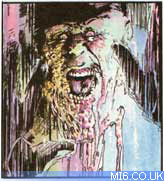
Above: Cell from "Shattered Helix
#2"
|
Best Line
Bullock: "Brains on top 'a beauty. Who'd'a thought I had
both?"
 |
|
MI6 Briefing
Title: Ian Fleming's 007 James Bond - Shattered Helix
Publisher: Acme Comics LTD, Dark Horse Comics Inc,
Glidrose Publications LTD
Released: Issue #1 - June 1994
Writer: Simon Jowett
Layouts & Colour: David Lloyd
Pencils & Inks: David Jackson
Letters: Elitta Fell
Editor: Dick Hansom
Book Design: Fuentes
Data Stream (Issue #2)
| Villains: |
Mr Barclay, Bullock, Cerberus |
| Plot: |
Bond must stop Cerberus stealing a deadly mutagen,
and releasing it upon the earth. |
| Bond Girls: |
Miss Serena Mountjoy |
| Allies: |
M, Robert Julien, Professor Philip Boyce |
| Locations: |
McMurdo Antarctic, Secret CIA Laboratory, Antarctic |
Left: Front cover
|
MI6 Rating
Related Articles
 "Shattered Helix #1" Review
 Newspaper Strips Index
Comics Coverage
 All Comics Articles
Images courtesy Dark Horse Comics.
|
| |

