"Quantum of Solace: The Game" Walkthrough
(1)
White’s Estate
Proceed forward, obtain the SAF .45, and
take cover. Allow the sentries to advance to your position. Eliminate
them (4) as they
attack you. Proceed to the end of the courtyard and obtain additional
SAF .45 ammunition. Turn right, locate the keypad, and approach
and activate it. To unlock the gate, you must mimic the green
arrows with your keyboard arrow keys. Do so four times and the
gate will unlock.
Proceed slowly. Retreat when the motorboat passes to avoid gunfire.
Proceed to the dock and take cover behind the wall. Eliminate
the guards with well-placed shots to either gas canisters. Turn
around – an enemy will rush through the locked doors. Eliminate
him and enter inside. Climb the right-side staircase and approach
the security center – specifically the device with a blinking
red light. Patch into the cameras.
Turn left and exit through the newly opened door. Ascend the
staircases and sprint through the greenhouse. Afterward, turn
left and proceed through the vineyard. Upon exiting, you will
view another large greenhouse. Enter (sprint) via the center
door and immediately take cover behind a wooden shelf. Eliminate
the security team. Incinerate the enemies via destroying the
left-side gas tank, if needed. Be wary of an additional security
team that will approach from the side. Change cover locations
often or enemies will flank you or throw grenades. Upon eliminating
the security team, the greenhouse exit will open.
Exit the greenhouse. Ascend the staircases and proceed to the
villa’s right side. Upon doing so, notice the right-side
second-floor balcony. (This is only visible from close range.)
A sentry will attempt to eliminate you from that position. Kill
him and his body will open the entrance to the cellar.
Enter the cellar and proceed left down the winding hall. If
needed, obtain the shotgun located in the second left-side room.
In the main room, take cover behind barrels and pillars and eliminate
the guards. Proceed to the opposite end of the room. Climb the
ascending staircase to your right. In the octagonal room, proceed
left and ascend the staircase to reach the kitchen. Take cover
and eliminate the dining room guards.
Proceed to the dining room, turn right, enter the large stately
room, turn left, and take cover behind the counter. Eliminate
the sentries – one in front, one left. Proceed upstairs
and ascend the left-side staircase. Walk forward, turn right,
and eliminate the sentry. Proceed down the hall and turn right
to enter White’s library. Proceed to the empty safe and
activate it to open a secret passage. Enter the secret passage
and approach the primary computer system, and hack into White’s
computer.
To escape the burning villa, run right. Turn left and walk around
the large gap. Turn left and descend the staircase to the first
floor. Turn right and proceed to the opposite side of the room.
Upon doing so, the wall will explode to reveal a second room.
Proceed through the second room to exit the villa. Ascend the
staircase to the helipad and shoot the helicopter until a cinematic
is triggered.
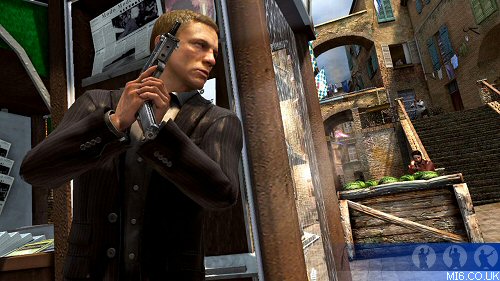
Siena
Exit through the room the assassin did and descend the
staircase. You will fall into a flooded room. Enter the tunnel
and follow
the straightforward path. Upon falling to a second floor to be
met with a locked gate, crouch and enter the right-side passageway.
Follow the straight-forward path until you arrive in a large
room.
Take cover and eliminate the security team. Work fast, the room
will be flooding shortly. Eliminate the surround enemies and
proceed along the left wall. You will approach a broken slanted
piece of concrete, allowing you to proceed to the second floor.
Proceed forward and you will view a balcony. Eliminate enemies
from here and jump down. Proceed to the end of the room. Enemies
will enter through a gate that will close shortly thereafter.
Eliminate them. To the left of the gate (and directly before
the pillar) is a small tower with a generator. Shoot the generator
from a distance and the gate will be demolished by the falling
tower. Proceed through the gate.
Proceed through the new passageway and enter the left-hand passageway.
Follow the straightforward path. Upon entering a room with small
waterfalls, turn right and follow the straightforward path. Shortly
afterward, you will enter part two of this mission.
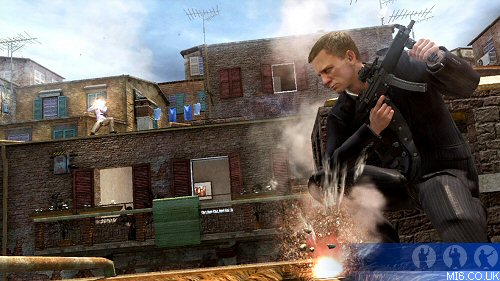
Proceed forward and take cover behind the right-side wall. Eliminate
the guards. Ascend the staircase and climb up the pole. Turn
left and enter the apartment through the window. Proceed forward
and turn right to exit the apartment. Ascend the staircase and
jump to the rooftop. Climb the wooden planks to reach the second
rooftop. Take cover and eliminate the guards from your position.
Afterward, proceed forward and jump down to another rooftop.
Proceed to the wall, turn right, and enter the apartment. Turn
right, take cover, and eliminate the enemies outside. Proceed
outside and jump to the house where the enemies were positioned.
Head forward, ascend the staircase, take cover, and eliminate
the guards.
Proceed forward and jump down to the crashed bus. Climb the
pole on the opposite side. Take cover immediately and eliminate
the snipers and approaching guards. Proceed to the left-side
tower eliminating new enemies as you go. Climb the staircase
and proceed for your first boss battle. When the target reticule
and target appear on the screen, position the target reticule
inside the target and press your fire button. Repeat this process
until the boss fight ends.
Opera House
Proceed forward to the small device with a blinking
red light. Patch into the cameras. Proceed forward (avoid the
camera) and
enter the second left-side alcove. Deactivate the camera via
the power box. If you are caught, an elite squad will come to
eliminate you. While this does not present a problem on lower
difficulty settings, it can become a death trap on Agent or 007
modes. Afterward, proceed forward and enter the makeshift passageway.
Your path will eventually be obstructed by misaligned bridges.
To fix this, press the left-side switch once and the right-side
switch twice. Proceed across the bridge.
Turn right twice and left once. The game will equip your pistol.
Crouch, attach the silencer and eliminate the guard with a headshot.
Apply your silencer to every weapon you use during this level
to maintain stealth. Proceed forward, left, and proceed forward
again to enter a small pond. To emerge upon the other side, proceed
forward all the way. Afterward, turn right and then left. A guard
will most likely be patrolling to your right side. Eliminate
him. Proceed outside and take cover behind the brick wall. Eliminate
the patrolling guard. Exit from cover and ascend the small ramp
to the flashing console. Activate the console and a container
will be lowered to create a makeshift bridge to the next portion.
Proceed across the bridge, turn right, and ascend the ramp.
Proceed forward and descend the right-side ramp. While avoiding
the camera, duck into the alcove. Directly beneath the camera
is its power box. While the camera looks away, sprint toward
the power box and deactivate the camera. Turn around and proceed
to the opposite end of the room. Turn left and you will see a
window. Above this window is a security camera. Exit through
the left-side door and crouch. Take cover behind the wall and
examine the camera. Directly beneath it is the power box. When
the camera looks ahead, sprint to the power box and deactivate
the camera. Look to your left and you will discover another camera.
The power box is located in the crawlspace directly underneath
the camera. Exit the crawlspace, proceed up the stairs, and enter
the room the camera was guarding. Exit through the left-side
door, take cover, and eliminate the patrolling guard. Climb over
your cover and proceed to the opposite end of the area.
Turn left, enter the fence, and ascend the staircase. Turn left
and you will see another small staircase. Ascend it. Turn right
and climb up the ladder. Proceed forward and climb over the small
bar. A second viewpoint will be visible – that of the sniper.
You may shimmy across whenever the sniper is not looking toward
the wall, either via the naked eye or his scope. Proceed forward
and ascend the staircase. Proceed across the balcony and eliminate
the sniper. He will fall and scream, but no guards will be alerted.
Ascend the staircase he was guarding and a cinematic will be
triggered.
Equip your silencer. After the first easily identifiable guards,
they are random and usually appear in any open space. A simple
strategy is this. When you see a laser, crouch. Quickly trace
the laser sight to the guard and eliminate him. Upon eliminating
enough snipers, a cinematic will be triggered.
Equip your SAF .45 and proceed forward. Ascend the left-side
staircase and take cover. Eliminate the two snipers atop the
small buildings. Proceed to where they were positioned. Upon
doing so, you will enter a mini-game of balancing. To avoid falling,
utilize your movement keys to keep the ball centered as often
as possible. Upon completing this mini-game, turn left and jump
down to the lower balcony. Take note of the barred descending
ladder to your left. Proceed across the balcony, open the yellow
case, and equip a new gun.
Take cover and eliminate the guards until a large explosion
takes place. Remember that barred ladder? Descend it. Sprint
across the deck – you’re looking to reach the road
quickly. You will not receive significant damage from enemies
- they will be killed by the explosions. After jumping across
a large gap (which the game warns you of), the mission will end.
Related Articles
 MI6 "Quantum of Solace: The Game" Coverage
"Quantum of Solace" campaign
players guide by Lethal Weapon for MI6. All rights reserved.
The players guide is for personal use only
and may not be republished without prior permission. MI6 can
not be held responsible for any errors or omissions from the
campaign mission walk through or gameplay tips.