|
| |
Single player campaign walkthrough guide now online
for the Athens chapter of "James Bond 007: Blood
Stone"...
|
|
"Blood Stone" Strategy Guide (1)
13th December 2010
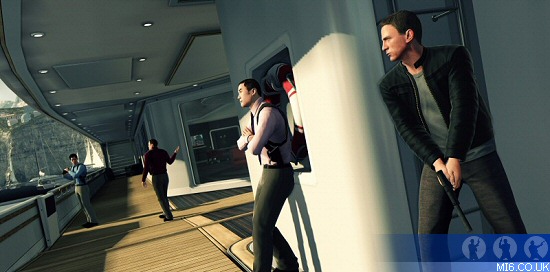
Athens
Conceal yourself behind the cargo boxes
until the sentry walks to the deck’s right side and views
the yachts with binoculars. Emerge from behind cover and execute
a stealth takedown to the guard. Proceed along the deck’s
right side and enter the bridge. Enter the automatically opening
center door and traverse the hallway to find a bar, with a guard
examining a laptop. Execute a takedown (stealth or otherwise)
on the guard, proceed outside, and descend the ladder, located
immediately right of the dining table. Takedown the guard immediately
beside you and eliminate the others. Enter the luxurious room
to the former guards’ right and proceed to the hallway’s
end to trigger a cinematic. Immediately seek cover and eliminate
the guards. Proceed to the server room (rightmost door), climb
the ladder, enter and traverse the hallway, and seek cover to
trigger another cinematic.
When the cinematic terminates, you’ll be pursuing Greco.
Stay close (within 50 to 250 meters) when pursuing him and trigger
the slow motion to eliminate enemy boats whenever possible. When
the lighthouse collapses, pilot right. When Greco commands the
helicopter pilot to eliminate you, trigger the slow motion upon
prompt and fire the Walther a couple times to trigger another
cinematic and final playing sequence.
From your present position, eliminate the guards. Later seek
cover behind the center villa pillar, with Bond’s back
facing the entrance. Enter the villa, traverse the right-side
hallway to the library, and open the left-side door. Emerge outside,
enter the right-side bar, traverse the left-side bridge, and
run right to enter another structure. Follow the linear path
to find yourself inside a luxurious area, with closed double
doors to the left. Kick open two sets of double doors and take
cover behind the white sedan. Fight across the parking lot in
order to enter a café, which the driving scene.
Unlike driving sequences in previous games, you cannot use weapons
against the target – you can only pursue him or her. Pursue
the bomb truck. When the first slow-motion event occurs, direct
oneself right. When you are driving to an 18-wheeler, divert
yourself to the right-side country road. When you enter a tunnel,
accelerate in order to make contact with the bomb vehicle. Doing
so will end the level.
Proceed to the street’s end and attempt to enter the worksite
to trigger a cinematic. Proceed down the incline and enter the
leftmost trailer, and scan the laptop inside. Exit the trailer
and enter another trailer northwest of your position. After scanning
another laptop, follow the worker to the foreman’s cabin,
west of your position. Enter the foreman’s trailer and
scan the laptop to trigger a cinematic. Sprint of the trailer
and jump to trigger another cinematic.
Execute a stealth takedown on the guard immediately in front
of you and execute a regular takedown on the distant guard. From
the second guard’s position, travel eastward and enter
another sub-construction site. You’ll come to a small opening
with a bulldozer and (soon to be) several guards present. Eliminate
the sentries, traverse the small incline, and seek cover behind
the wall. Eliminate additional guards and proceed forward. You’ll
arrive at another small opening with crane-supported walkways
present. From the second walkway, face rearward and equip your
Smartphone to view the crane section you need to break. Shoot
it to trigger a cinematic and gain access to the tunnel system.
Proceed using the middle path, vault over the concrete pile,
and continue advancing. Enter the left-side corridor it emerges
(directly across the easier-to-spot right-side corridor). Proceed
through the corridor to emerge in another set of tunnels. Enter
the right-side corridor at the tunnel’s opposite end. Proceed
through to emerge in a room with a circular guardrail. Proceed
along the left side and enter the first corridor. Enter the right-side
maintenance room and switch the tracks. Return to the second
tunnel you entered and proceed to the lighted tunnel car. Operate
the tunnel car (the switch being located right-side) to emerge
in a new tunnel system.
Ascend the right-side planks, traverse the walkway, and drop
to ground level. Advance toward the lighted path and follow it
to the ladder. Doing so will alert the enemy to your presence.
After climbing the ladder, follow the relatively straight-forward
wooden path (while climbing, jumping or shimmying whenever necessary)
to trigger a final brief cinematic and emerge in a new area.
Drop to ground level, advance forward, and execute a takedown
on the sentry. Continue advancing forward and you’ll soon
find yourself in a large pillared flooded room. Continue along
the linear path and, upon entering the small lighted tunnel,
climb the wall. Traverse the corridor to find yourself in a decrepit
prison. Proceed to the middle and seek cover behind a pillar.
Execute a stealth takedown on the advancing guard and unceremoniously
eliminate the others. Proceed through the jail, enter the right-side
cell, and speak to the prisoner (who is, unfortunately, not Tedworth).
After the dialogue, climb the bed and wall and shimmy to a wooden
walkway. Follow the path to a gap and jump rightward. Drop to
ground level and continue down the leftward corridor to emerge
in another large flooded room. Proceed along the straightforward
path and climb the eventual wall. Before you emerge from the
corridor, take cover, eliminate the guards, and seek cover behind
their position. Later continue to the pillars’ position,
seek cover, and eliminate enemies there. Proceed along the relatively
straightforward path (get used to reading that phrase often)
until you drop to ground level. At ground level, look rightward
and climb the ladder. Continue forward and climb another ladder.
Follow the path and descend the final ladder when you view it.
Continue following the path until you trigger a cinematic, which
triggers the driving scene.
Pursue Berlin’s car (preferably within 150 meters) while
being mindful of the radar in order to determine which roads
he drives. When the petrol station explodes, drive rightward.
When a white Beetle flips amongst two large buses, drive rightward.
From your position, eliminate the guards and proceed forward.
Follow the straightforward path until you emerge in a large opening
with collapsed pillars. Ascend the left-side ladder. After ascending,
kick the wooden support from the mechanical gear to create a
walkway. Traverse the walkway and proceed left to return on the
path. When you arrive at the opening where the armored car parked,
proceed to the opening’s middle and look right to discover
the exit and continue on the path to eventually end the level.
"
James Bond 007: Blood Stone" campaign players
guide by 'Matt' for MI6. All rights reserved. The players
guide is for personal use only and may not be republished without
prior permission. MI6 can not be held responsible for any errors
or omissions from the campaign mission walk through or gameplay
tips.