|
| |
Single player campaign walkthrough guide now online
for the Burma chapter of "James Bond 007:
Blood Stone"...
|
|
"Blood Stone" Strategy Guide (5)
19th January 2011
Burma
Break free from your restraints and exit the jail cell. Advance
down the hallway, take cover behind the wall corner, and execute
a stealth takedown on the guard. Continue down the corridor
and enter the right-side wall’s last room. Execute another
takedown on the stationary guard, exit the room via the other
doorway, and ascend the stairs. Your smartphone and pistol
are located in the northeast (upper-right corner) of the room.
Equip your smartphone and scan the door’s electronic
lock to escape.
For the next several stages, be extremely quiet
so as not to make sections unnecessarily difficult. If enemies
are alerted to your presence, restart from the checkpoint. After
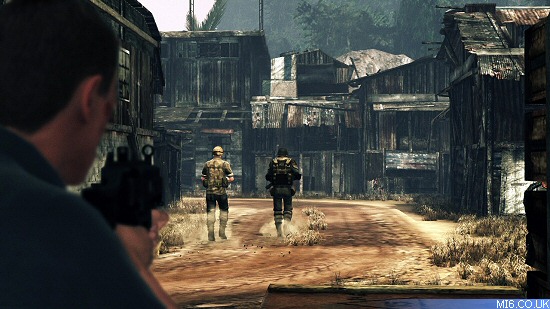
exiting the door, slowly advance toward the opposite end of the
opposite end of the camp, across the cars, prisoners, soldiers,
and tanks. Advance behind an unsuspecting guard (with a concrete
blockade blocking you) and execute a stealth takedown.
Advance further
until you’re parallel to the APC and are watching a guard
advance. Execute a stealth takedown and continue along. Continue
advancing rightward until you view three guards (the third is
leaving). Advance toward the furthest guard and execute a stealth
takedown from the left (the guard’s left). Return to the
closer guard and execute a stealth takedown from the right (the
guard’s right). Advance up the ladder and take cover behind
the wall to avoid detection by guards below. Execute a takedown
on the guard who left when you confront him. Advance to the watchtower
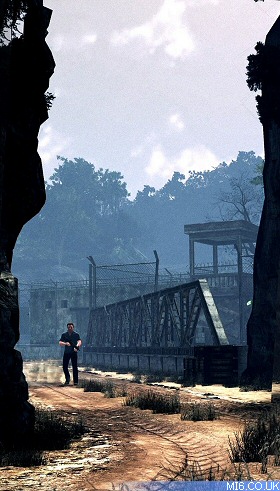
at the opposite end and vault down. Run to the gap and jump down.
Walk toward the bridge, jump onto it, and shimmy across. Shortly
after you do so, the enemies will be alerted to your escape.
After finishing shimmying, execute a takedown
on the unsuspecting solitary guard and continue along the path
the enemies took.
Enter the cavern when you view it. When you emerge, immediately
take cover behind the boxes and quietly dispose of the present
guards. Advance further into the camp, take cover behind what
you deem suitable, and eliminate the additional guards with an
automatic weapon. Afterward, travel to the exit, northeast of
the entrance. In the exit corridor, climb to the ledge and drop
to ground level shortly thereafter. Take cover behind what you
deem suitable and wait for the patrol to pass. Afterward, execute
a stealth takedown on the unsuspecting solitary guard. Advance
to where the patrol went and quietly eliminate the two guards
around the fire without alerting the patrol. Take cover behind
what you deem suitable and eliminate the guards around the armored
personnel carrier. Sprint to the stairwell,
while taking cover to heal as necessary. Obtain the grenade launcher
on the bridge and fire all remaining grenades at the APC.
Follow
the path to ground level and take cover behind the closest appropriate
object. Make your way left – away from the APC. Take cover
behind another appropriate object and eliminate the enemies ahead.
Advance directly to their former position and ascend the ladder
(located left if looking toward where you advanced). Retrieve
the grenade launcher, but do not fire. Drop to ground level,
take cover behind the wall, and eliminate the enemies. Advance
forward to the exit, but continue to seek cover inside while
eliminating enemies outside. Sprint up the stairs and immediately
seek cover – obtain the additional grenades and, while
staying behind cover, fire at will to the APC. Its destruction
requires seven grenades on Field Operative difficulty. After
its destruction, vault to ground level and advance left.
|
Jump off the wing’s opposite side
emerge in a jungle, in a scene reminiscent of GoldenEye’s
Jungle level. Follow the path in
order to emerge at a construction site. Take cover behind
what you deem appropriate and eliminate the enemies.
Advance
toward the opposite end of the construction site and advance
leftward to the blue crane. Jump onto the blue crane and
immediately seek cover. Move to the console, activate it,
and seek cover behind it. After the crane finishes ascending,
climb onto the white platform and enter the crane control
room. Assume control of the crane and drop it directly
onto the helicopter in order to destroy it. Afterward,
position the crane right – Bond will automatically
exit when it is positioned correctly. Advance the ladder,
advance another ladder to your left, advance across the
newly created walkway, and jump from the walkway onto plane
wreckage, permitting you to gain access to the building.
Upon combating enemies, receive focus aims.
At the fork,
take the left path and follow the straightforward path
until you emerge in a large room. Eliminate all enemies,
using recently acquired focus aims when you deem necessary.
The exit – a large red corridor – is northwest
of your position. Fight to the end of the corridor to the
elevator. |
|
|
Advance upstairs and downstairs until you emerge
outside. Whenever emerging outside in this level, prepare for
a long (albeit not necessarily difficult) battle. Ascend the
outside stairs and immediately seek cover, preferably outside
the structure. Enter the structure when you deem appropriate
and seek cover inside whilst eliminating enemies outside. Use
the Smartphone
to locate them, if needed. Move to the additional set of stairs
and enter the small structure. Activate the console to lower
the bridge, exit the structure, and seek cover. As the bridge
lowers, eliminate the enemies. Reserve focus aim shots for snipers,
identified by a green laser sight. After the bridge lowers, continue
eliminating enemies. After you’ve eliminated all enemies
(verify with Smartphone), advance across the bridge.
Advance up the stairs (located left) and follow the straightforward
path to a large clearing with enemies. Take cover behind the
wall corner or railing and eliminate enemies. Continue down
the straightforward path. When you come to the track, advance
toward
the circular control center and use the computer to restore
power. Advance toward the tram’s blue console and activate
it to begin moving. Take cover behind the boxes. As the tram
moves,
enemies will fire but unless they damage you, eliminating them
is unnecessary and a waste of ammunition. When the tram arrives,
retain your cover while eliminating enemies. After exiting
the tram, continue advancing upstairs and following the straightforward
path. When emerging outside, follow the path downstairs to
the
elevator. It will automatically ascend.
|
After emerging from the elevator, follow
the linear path while activating the blue consoles as you
progress, taking cover behind them if necessary. Activate
the first console, around the hall from where you exit
the elevator. Proceed right to view another console to
activate – activate it upon your arrival. Follow
the path up the stairs, being careful of the guard at the
top. Emerge outside, eliminate the guard, and activate
the console. Jump across the left-side gap and advance
forward to view and activate another console. From the
console, peek up and eliminate two guards in front of your
path. Continue along the path, inside briefly, and emerge
again to view another jump. Make the jump and dash to the
small control panel, which triggers a cinematic. When control
returns to the player, eliminate Rak. |
|

|
"James Bond 007:
Blood Stone" campaign
players guide by 'Matt' for MI6. All rights reserved. The players
guide is for personal use only and may not be republished without
prior permission. MI6 can not be held responsible for any errors
or omissions from the campaign mission walk through or gameplay
tips.